How to Design Sheet Metal Parts for Fitting With Hardware
Choosing the right hardware and designing sheet metal to fit it is one of the most critical aspects of sheet metal manufacturing. Designing parts correctly for hardware can be difficult – countersinking material for flush rivets, picking the right depth of threading, ensuring the part is actually thick enough to accommodate screws.
Decisions related to hardware fall into two categories. In the first instance, the right types of hardware need to be chosen. In the second instance, sheet metal parts need to be designed correctly so that they can accommodate hardware. Poor choices of hardware or poor design of parts for accommodating hardware can both result in the failure of a part or product – disassembly due to vibration, seizing due to stainless steel galling, etc.
In some cases, choosing hardware and designing parts to accommodate hardware turns out to be more complicated than expected.
Hardware choices are covered in detail in our other article on how to choose the right hardware for your sheet metal project. In this article, we’ll focus on the design considerations that need to be made so that sheet metal parts are easily and securely assembled by the chosen hardware.
Key Takeaways
- Picking the right hardware material is important. If a screw is too soft compared to the material, or if you use stainless steel fasteners in a stainless steel part, you are going to have problems.
- Hardware size, thread depth and part thickness need to be considered in relation to each other. If your thread is half the depth needed for the screw length, it is not going to work.
- Your sheet metal design needs to consider where and when to install the hardware. If there’s not enough room to install a rivet after bending, for example, then you need to do it before.
- The position of holes and hardware supports needs to be carefully checked to make sure they align and are not too close to each, edges or bends where they could weaken the part or interfere with assembly.
- Sheet metal part thickness needs to be carefully considered in relation to hardware. If you part is too thin to tap, then you can’t use a screw.
- Check the depth of countersinks and counterbores carefully – can your screw actually fit in them? Are they too deep for the part, i.e. will they bottom out?
Table of Contents
- Key Takeaways
- Design Considerations for Sheet Metal Hardware
- Distance From Edges and Bends, and Between Holes
- Other Considerations
- Countersinks and Counterbores
- How to Choose the Right Material for Sheet Metal Hardware
- Timing of Hardware Installation
- Hardware Selection
- Conclusion
- Frequently Asked Questions
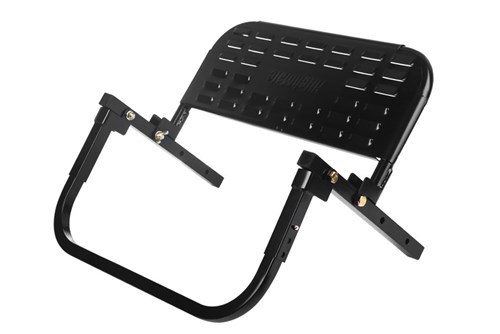
Fig. 1: Sheet Metal Product
Design Considerations for Sheet Metal Hardware
In this first section, we’ll run through the main considerations that need to be made when designing sheet metal parts to accommodate hardware.
Hole Positioning
Holes and hardware supports need to be positioned the correct distance from bends (or other similar features), edges and from each other. There are guidelines that can be followed, but there are a number of variables that come into play, and the correct positioning of any piece of hardware depends on:
- The specific hardware being used.
- The sheet metal part it is being attached to.
- How the product will be used and other possible factors as well.
Part Thickness
Part thickness is a concern both due to the need to leave clearance room for installation of hardware (rivets, bolts or screws), and the need for sufficient thickness to accommodate specified threads or chamfering. Parts that do not provide this clearance room will not be able to be assembled. Parts that are too thin will have the thread fail, hardware fall out or chamfers bottom out.
Hardware Support Features
It’s also important to remember that hardware supports must be correctly sized and machined for the intended hardware. Sufficient and correctly sized threading is needed. If hardware needs to be flush, countersinking or counterboring is required for the sheet metal parts.
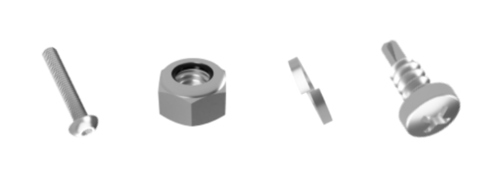
Fig. 2: Sheet Metal Hardware
Distance From Edges and Bends, and Between Holes
The three most important considerations are related to the positioning of hardware on a sheet metal part. Holes that are machined out for hardware need to be minimum distances from the edge of a part, from bends and from each other. If hardware positioning is not carefully analyzed, hardware may fail, or it may not be possible to correctly assemble the part with other parts.
The exact positioning will depend on a range of factors. The type of hardware being fitted, the thickness of the sheet metal part, the size of the hole and the function of the sheet metal part are the main considerations. There is, however, a wide range of potential factors to consider. Your fabricator should review designs thoroughly before manufacturing to ensure no mistakes are made.
Nowadays, design software such as Solidworks will often automatically adjust designs so that holes and supports for hardware are positioned within guidelines for positioning. Find out more about preparing technical drawings for your sheet metal fabricator here.
1. Distance From the Edge
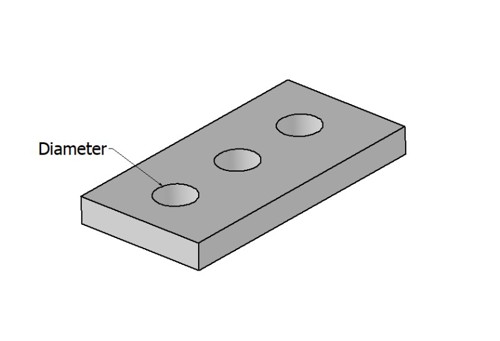
Fig. 3: Distance From the Edge and Between the Holes
Hardware must not be placed too close to the edge of a sheet metal part.
If holes are placed too near the edge, the part may be weak at the point where the hardware is installed. Otherwise, the part may become warped at the edge, near the hole. The main factors that influence the distance between holes and the edge of a part are the thickness of the part and the type of hardware being fitted.
| Feature Type | Minimum Distance Guidelines* |
|---|---|
| Between hole and a bend | ±2.5 x part length + bend radius |
| Between a slot and a bend | ±4 x thickness + bend radius |
| Between a hole or slot and edge | ±2 x material thickness |
| Minimum distance Between holes | ±2-3 x material thickness |
| Between an extruded hole and an edge | ±3 x material thickness |
| Between an extruded hole and a bend | ±3 x material thickness + bend radius |
| Between semi-pierced hole and a bend | ±3 x material thickness + bend radius |
| Between semi-pierced holes | ±8x material thickness |
Table 1: Minimum Distance Guidelines
2. Distance From Bends
Hardware also shouldn’t be placed too near to a bend. If hardware is placed too near a bend, this will often mean that the part does not align correctly when it is assembled with other parts.
Hems and curls are treated differently to bends, and there are different distancing requirements for holes located near these features.
| Tolerance Guidelines* | |
|---|---|
| Forming or bending | +/- 0.508 mm (0.020") |
| Bend to hole or feature | +/-0.254 mm (0.010") |
| Diameters with inserts | +/-0.0762 mm (0.003") |
| Angularity | +/- 1° |
| Holes | +/-0.127 mm (0.005") |
| Edge to edge | ±0.127 mm (0.005") |
| Edge to hole | ±0.127 mm (0.005") |
| Hole to hole | ±0.127 mm (0.005") |
| Hole to hardware | ±0.254 mm (0.010") |
| Edge to hardware | ±0.254 mm (0.010") |
| Hardware to hardware | ±0.381 mm (0.015") |
| Bend to hole | ±0.381 mm (0.015") |
| Bend to hardware | ±0.381 mm (0.015") |
| Bend to edge | ±0.254 mm (0.010") |
| Bend to bend | ±0.381 mm (0.015") |
Table 2: Tolerance Guidelines
3. Distance Between Holes
Holes need to be correctly distanced to avoid structural weakness in the part and to avoid having pieces of hardware that are in too close proximity. Holes which are too close together will weaken the material and the holding strength of the fastener. Unevenly spaced holes can also increase the strain on one fastener versus another.
When it comes to the structural integrity of the part, the main determining factors are the thickness of the part and the type of hardware being installed. To avoid having hardware in too close proximity, it’s necessary to consider types of hardware individually and assess clearance requirements.
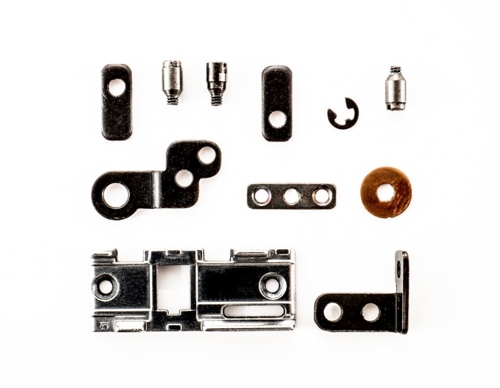
Fig. 4: Distance Between Holes
Guidelines for Sheet Metal Hardware Positioning
The table below provides some basic guidelines that can be followed for locating hardware in relation to edges, bends and other pieces of hardware. Note that these guidelines are not definitive. They may need to be adjusted for some projects. You should always review designs carefully with your fabricator before any production takes place.
| Consideration | Minimum Distance Guidelines |
|---|---|
| Distance between a hole or slot and the edge | 2 x material thickness |
| Distance between a hole and a bend | 2.5 x part length + bend radius |
| Distance between a curl and a hole | Curl radius + material thickness |
| Distance between a hem and a hole | 2 x material thickness + hem radius |
| Distance between holes | 2-3 x material thickness |
Table 3: Minimum Distance Guidelines for Sheet Metal Design
Other Considerations
Here are some other design considerations that need to be made for sheet metal hardware.
Minimum Part Thicknesses
Hardware may have minimum thickness requirements for the sheet metal it will be installed on.
- If hardware is installed on excessively thin material, the part may fail to support the hardware. This would cause the entire part to fail.
- Some types of hardware also have minimum thickness requirements for correct engagement.
- Screws, for example, need a minimum number of threads in the part for correct engagement. The part must be at least thick enough to be fitted with the correct number of threads.
- Rivets cannot be installed on parts much thinner than 1mm, or there will be insufficient material to crimp and hold the rivet.
- Countersunk screws or rivets need material of sufficient thickness so that the head can be flush without bottoming out through the bottom of the sheet
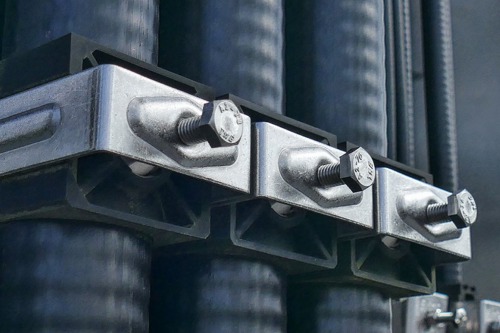
Fig 5. Fitting Hardware
Fabrication Equipment Requirements
Another consideration that needs to be made relates to the machinery that will be used to create holes for hardware or to install hardware.
If presses or other devices are used, they may need to have a certain amount of clearance room from protruding features on the part. If there isn’t enough clearance room, they will hit the feature. This will cause damage, or the process will not be possible. As such, equipment clearance requirements need to be factored into designs.
In some cases, it’s possible to avoid this problem by sequencing fabrication processes differently.
Hardware Requirements
The final thing to mention in this section is that it’s important to make sure that designs are simply correct for the type of hardware being installed.
- Hole sizes need to match hardware sizes
- thread types need to be correct
- for rivets, the rivet material MUST be harder than the material to which it is applied
- Clinch nuts, for example, need to be installed so that the load direction is correct.
- In case of special hardware or clinch nuts, please check installation instructions
Countersinks and Counterbores
Where holes for hardware will be installed with a countersink or a counterbore, the location of the hole will need to be adjusted to accommodate the countersink or counterbore. More clearance from edges, bends and other features will be required to accommodate countersinks and counterbores.
The table below gives some basic guidelines that can be followed. Note that these guidelines are not definitive, and each sheet metal design needs to be carefully examined.
| Consideration | Minimum Distance Guidelines |
|---|---|
| Distance between countersink and edge | 4 x material thickness |
| Distance between countersink and bend | 3 x material thickness |
| Distance between countersinks | 8 x material thickness |
| Distance between counterbore and edge | 4 x material thickness |
| Distance between a counterbore and a bend | 4 x material thickness + bend radius |
| Minimum distance between counterbores | 8 x material thickness |
Table 4: Minimum Distance Guidelines for Countersinks and Counterbores
How to Choose the Right Material for Sheet Metal Hardware
Stainless steel, steel, silicon bronze, brass and aluminum are all common materials used for sheet metal hardware.
When choosing the material for sheet metal part hardware, the factors to consider are functionality, aesthetics and compatibility. Hardware needs to perform correctly and look appropriate, first of all. As well as this, however, there are certain considerations that need to be made with regard to compatibility. Material compatibility is something that can be overlooked by inexperienced designers.
Functionality
- This requires you to consider what type of operating environment the product is in, and what kind of risks or challenges it will be exposed to.
- Metals such as stainless steel, for example, offer a higher level of corrosion resistance, and will make a good choice for parts that will be used outdoors.
- Rivets are cheap and quick to assemble, but they can loosen over time in a moving assembly.
- Screws can back out of parts exposed to vibration, so they need to be paired with spring/lock washers or other fastening solutions.
Aesthetics
- Metals such as brass and bronze will offer big advantages in terms of aesthetics.
- Zinc plated screws tend to be a bit less attractive.
- Do you need hardware that matches your part’s color? You can purchase some hardware in specific colors.
Compatibility
- This is a slightly more complicated issue, requiring more knowledge of material qualities. Hardness and galvanic corrosion are key issues of compatibility.
- It’s usually best to choose hardware that is made with a material that is harder or equal in hardness to the part. This avoids situations in which the hardware becomes damaged during insertion.
- Harder hardware will also grip better with sheet metal parts that are not harder than it is.
- For galvanic corrosion, it’s important to avoid using incompatible metals that will cause galvanic corrosion to take place. Galvanic corrosion is discussed in detail in our accompanying article here.
Find out about how to choose the right material for sheet metal parts here.
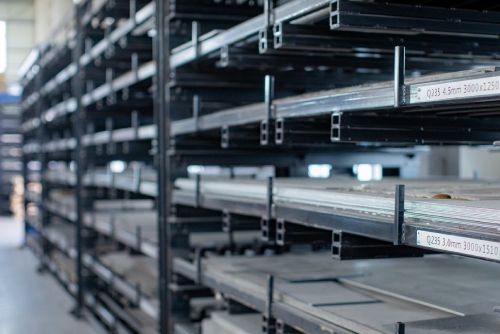
Fig. 6: Sheet Metal Plates
Different materials offer advantages in some areas and disadvantages in others. Have a look at the table below for more information:
| Hardware Material | Advantages | Disadvantages |
|---|---|---|
|
Stainless steel fasteners |
|
|
|
Steel fasteners |
|
|
|
Silicon bronze fasteners |
|
|
|
Brass fasteners |
|
|
|
Aluminum fasteners |
|
|
|
Zinc plated fasteners |
|
|
|
Chrome plated fasteners |
|
|
|
Hot dip galvanized fasteners |
|
|
Table 5: Advantages and Disadvantages of Different Hardware Materials
Timing of Hardware Installation
Another sheet metal design consideration for hardware that needs to be made is the timing of installation in the fabrication process.
It’s important to make sure that hardware is installed at the correct stage. Other fabrication processes may need to happen before or after hardware installation. Otherwise, it may be more efficient to install hardware at a point in the production process where access to the location is easier.
Some important points:
- You should generally plan to install rivets or standoffs prior to powder coating or painting to avoid damaging the surface finish of the product
- Surface finishing which requires acidic pretreatment will remove the protective coating from zinc plated hardware and cause rusting
- For certain parts, rivets or standoffs may need to be installed before forming or bending to make sure there is sufficient clearance for installation
Hardware Selection
As we said at the start, when you’re considering hardware in sheet metal design, the three most important things you need to do are:
- Choose the right types of hardware
- Design parts correctly so they correctly accommodate the hardware
- Use hardware which can be mounted in the thickness of sheet you are using
The natural way to approach sheet metal parts and hardware is to first decide what kind of hardware your sheet metal part needs. Design considerations for hardware incorporation usually come after hardware types are chosen.
Hardware selection is itself a complicated issue. There are various types of hardware, and the different hardware types come in a range of specifications, such as for size and materials. Sheet metal screws come in a range of types, for example. Different hardware types function differently and suit different applications.
If you are unfamiliar with hardware choices, please review our article on sheet metal hardware selection.
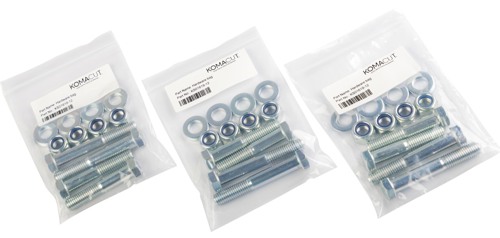
Fig. 7: Custom Hardware Kit from Komacut
Conclusion
It’s important to make sure that sheet metal parts are designed correctly if they will be fitted with hardware. The type of hardware and the sheet metal part need to be carefully examined, and designs need to be checked to make sure that the hardware will not fail or cause poor part performance. Design faults may otherwise cause problems in process or make
Your manufacturer should always carefully review hardware designs before production to identify any problems.
If you want to find out more about hardware types and about how to select the right type of hardware, have a look at our article on sheet metal hardware selection here.
- Key Takeaways
- Design Considerations for Sheet Metal Hardware
- Distance From Edges and Bends, and Between Holes
- Other Considerations
- Countersinks and Counterbores
- How to Choose the Right Material for Sheet Metal Hardware
- Timing of Hardware Installation
- Hardware Selection
- Conclusion
- FAQs
Find the Perfect Hardware for Your Sheet Metal Parts
Explore the Komacut hardware store for a wide selection of rivets, screws, bolts, and more—carefully selected to ensure the perfect fit for your sheet metal parts.
Frequently Asked Questions
Are there guidelines I can follow when designing sheet metal parts for hardware?
There are basic guidelines that you can follow for positioning hardware from features on sheet metal parts such as edges, bends, countersinks, counterbores or other pieces of hardware. We have given them in this article.
Guidelines are, however, only indicative, and all designs should be reviewed by an experienced manufacturing engineer.
What mistakes do you need to avoid when designing sheet metal parts for hardware?
Common mistakes are positioning holes for hardware to close to each other, too close to edges or too close to features like bends, hems and curls.
Other mistakes include choosing the wrong material, choosing the wrong type of hardware or incorrectly sequencing hardware installation in the manufacturing process.
